
Sometimes you decide to buy an HTML template and customize it by yourself. But when it comes to editing the code, you feel clueless, Shit! Where the hell shall I start from?
Don’t get panic. This tutorial is all about how to edit or customize an HTML template. We will step you through the entire process.
We are assuming that you have zero or very little knowledge of editing an HTML code. We will discuss all the steps from top to bottom, with example and screenshots.
Let’s start together!
What HTML Stands For?
HTML stands for ‘Hyper Text Markup Language’. However, you will be editing a series of opening and closing tags to customize a template.
<h2>h1...h1</h2>
All the tags start and close with a < and > signs, the closing tag always has a / in it. Contents are put between two tags like the following example.
<h2>Hello World!</h2>
Some tags don’t have a closing partner with a /. For example,
<img src="panda.jpg">
These tags have different usage and functions on a webpage. The above example of <h2></h2> will display a large heading reading “Hello World!” and the example of the image tag will show an image on the webpage.
To customize a template, you have to know which tag displays what part of the content on the webpage. Then how to find that tag in the code and change it to show the content you want it to show.
Get Yourself a Code Editor
Normal notepad is enough to edit the HTML code, but it is better if you use a special code editor to edit the template. Code editors highlight the code with different colors, which makes customization easy and smooth. There are several Text Editors like-
1. VS code
2. Atom
3. Sublime
We are going to use Sublime Text here.
Download and View Your HTML Template
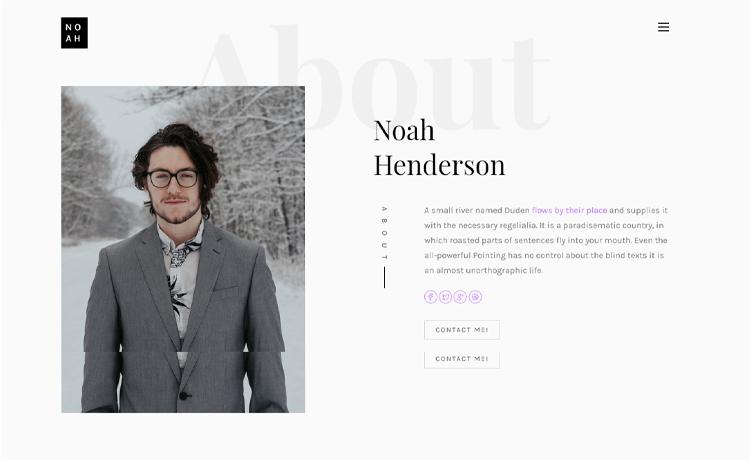
Download the template you want to edit. You can customize a free template, or you can purchase one. We are going to use Noah for demonstrating purpose. You can download it from here
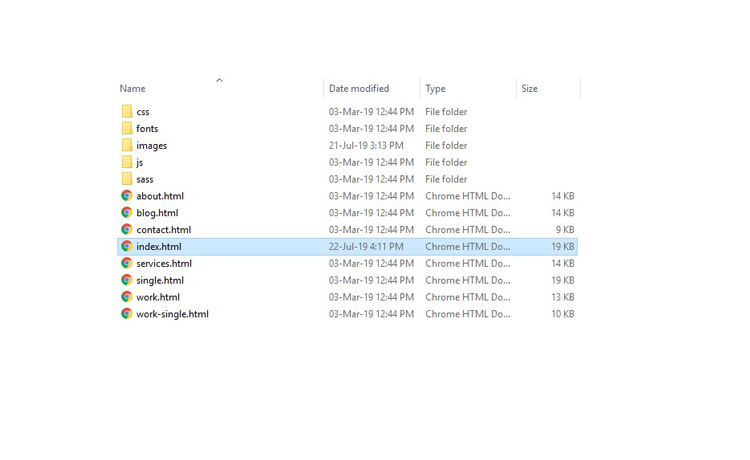
Most HTML templates come in a zipped file. Go to the folder where your template has just been downloaded and extract it. Find ‘index.html’ or ‘index.htm’.
In our example, index.html file is in Noah-master directory after extracting the zip file.
Now open the file in any browser, for instance- Google Chrome. Using Chrome as the browser will bring you some extra features while editing the template.
Identify The Parts You Want To Change
CSS – the language responsible behind page styling. You have to dig into the CSS to change the content of a website. As you are new or unfamiliar to HTML codes, you should pick one part of the content at a time while customizing a template.
Let’s see how the demo template looks like on Chrome and let’s figure it out which part of the theme we need to change. You can make a list of edits or changes which you need to do to make the theme ready for your project.
In Our Example Template, We Will Change The Following Things –
- Name
- Profession
- Personal Picture
- About
- Social Media Links
- Services and Skills
- Copyright Text
We have listed the things we shall change. Now we can locate the corresponding tags in the HTML code. Let’s do it!
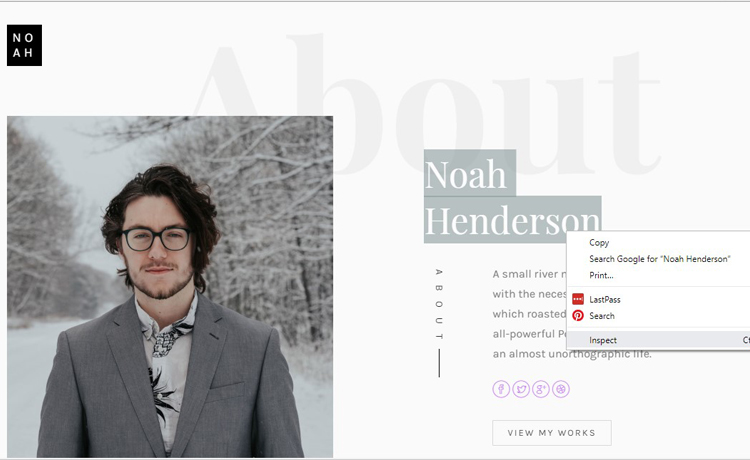
Find The ‘Name’ Tag In The Inspector
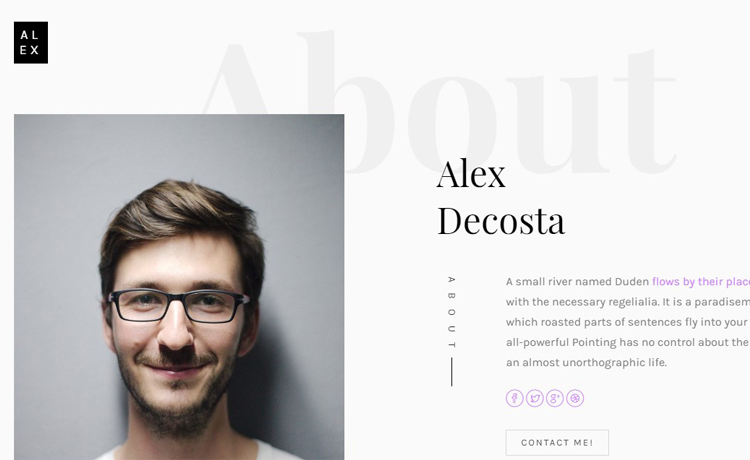
Right-click on the name where it is reading ‘Noah Henderson’ by default.
A panel like the following screenshot should open in your browser.
This is an interactive way of looking at the code. Hover your mouse over the line that shows <h2>....</h2> (heading level two tags) and the name section of the template is highlighted.
By hovering your mouse over the lines of the code, you will see different lines are lighting up. Find the exact part which you want to change. This panel is going to help you find the exact line where you need to edit the code.
Now expand the <h2>...</h2> by clicking on the small triangle to the left. There are two tags … These tags have the name text i.e Noah and Henderson.
![]()
These words match with the screen name of the webpage. So, you know how to find and edit codes now.
Edit the Tag in HTML
Now open your HTML file (index.html) to edit it with the Sublime Text. You will see something like the following.
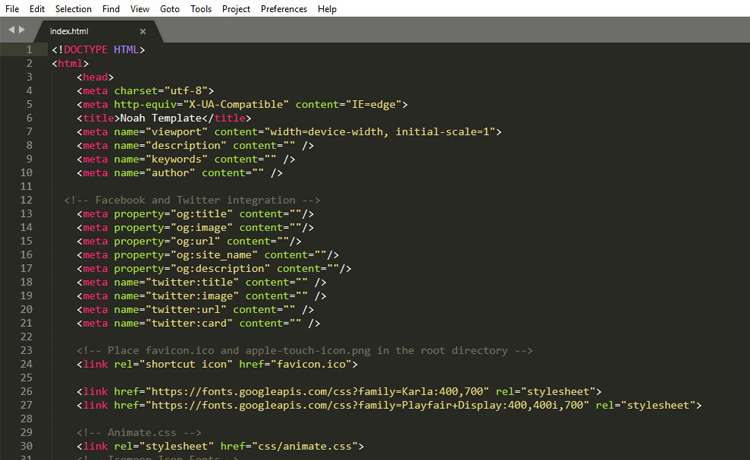
You are looking for the code you have seen while inspecting the webpage. Go through the lines until you find the line number 132. It has the tags you should edit to change the name of your website.

Now edit the content which is already there in between the tags. Change the name to your name and profession as yours. Delete “Noah” and “Anderson” with your first and last name.
Then, change the profession and write your own in “A Designer” portion of the tag.
Change the logo text on line number 105. Replace “No” and “Ah” with “Al” and “Ex” to show your name in the logo text.

Save the changes and reload the browser to see the changes.
Repeat The Same Process to Edit Other Contents
The basic process of editing is now-
1. Inspecting the element you want to change
2. Finding out corresponding tags
3. Identify the tags on the HTML file
4. Edit the code and change the content
Let’s edit the other contents based on these basic processes.
Add Your Image
On the left of the name and profession, there is an image slideshow. Let’s change the demo images and replace them with your images. Right-click on the image and inspect it.
<img class="img-responsive about-img" src="images/about.jpg" alt="">
Go to the index or HTML file and find line numbers 121 and 124 and identify the tags.

For this tag, you need to change the value of the src attribute by editing what’s in between its quotation marks the img tag. You are going to change it to the file name and location of your image.
Copy an image of yourself which is 800px by 972px in size.
Paste your image into the “images” folder; it is in the same folder as your “index.html” file.
In the HTML file, change the value of the src attributes, replacing “about.jpg” and “about-2.jpg “with the filenames you just pasted on the “images” folder. Carefully check the file extensions you type out is the same as the one on your files, e.g. “png”/”jpg”.
Save the code and refresh the browser and you’ll see the images are sliding now.
Social Media Links Change
Now let’s replace the links of the social media icons in the top right corner and bottom left corner of the template. As you know, right-click on one of the icons to inspect it. In the inspection window, look for the highlighted line, and you’ll see it includes the text “icon-facebook4”. You need to use this to find the code in the HTML file.
You can use the find option to find-out exact text in the HTML file. Press CRTL+F and run a find for “icon-facebook4”. You will see it on line 144.

The a tag on line 144 is what creates the link on the icon, and the href attribute determines where it is going to redirect you. You have to replace the # value of that href attribute with your Facebook URL (for example –http://facebook.com/themewagon).
Replace the default # with your URL. Repeat the same thing for Twitter on line 145, Google+ on line 146 and Dribble on line 147.
Do the same thing for the bottom left corner social media icons.
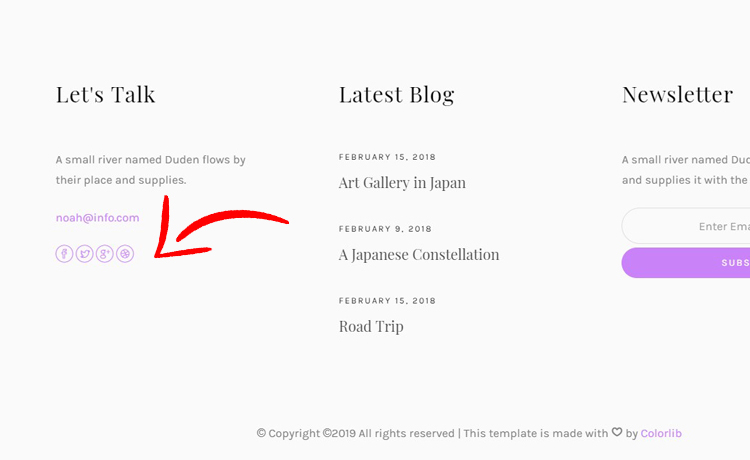
You can entirely delete an icon too. Select from <a> to </a> and delete it if you want.
Edit The About Section
Now let’s edit the about section. This section is about yourself and holds information about you.

First, right-click and inspect the paragraph, it will show you the specific lines where you’re going to make the change. Actually, the default paragraph is a demo text; you need to write down your own information here or can copy-paste from somewhere else where you have written it already.
In the inspector window, you should see it has highlighted a p tag— and that tag is responsible for creating paragraphs in the text. Let’s see what a whole section of text looks like in the code.
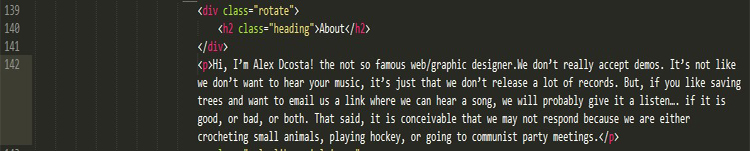
In the index.html file, go through the code until you see the ‘about’ text you’re looking for. You’ll find it wrapped inside a <h2>...</h2> tags, which create a level 2 heading. You will find the <p>...</p> tags just after that.
Now, replace the text for the About section with your text. If you want to divide your text into several paragraphs, you can wrap each paragraph of your text with <p>...</p> tags.
Save the HTML document and refresh your browser and see the text has been customized.
Customizing Services Section
In the services section, right-click on skills and inspect one of the skills. You should see <h3>...</h3>. There are <ul> tags and in between them there are <li>...</li> tags to list your skills.
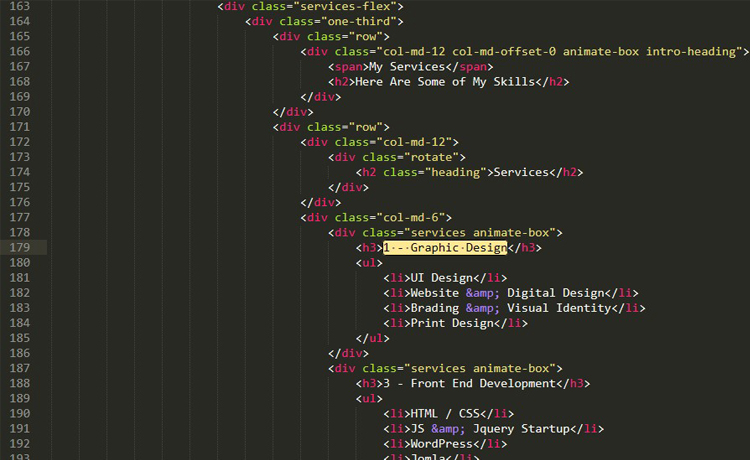
Open index.html and find out’ 1 – Graphic Design’ by pressing CTRL+F option to search the exact text. Here you are, just edit the skills and write down your skills in between the <li>...</li> tags.
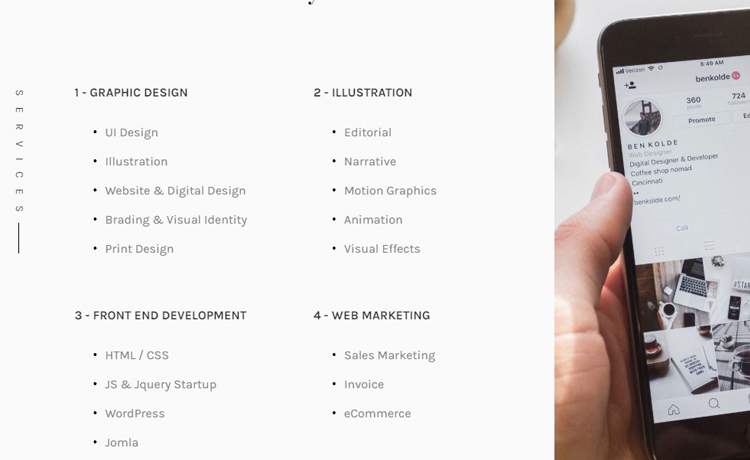
Now save and reload and you will see a new skill added into Graphic Design.
Edit Copyright Text
With the services edited we’re down to the last item on the list of changes; the copyright message in the footer. We are going to use the same process again. Right-click the copyright message and inspect it.
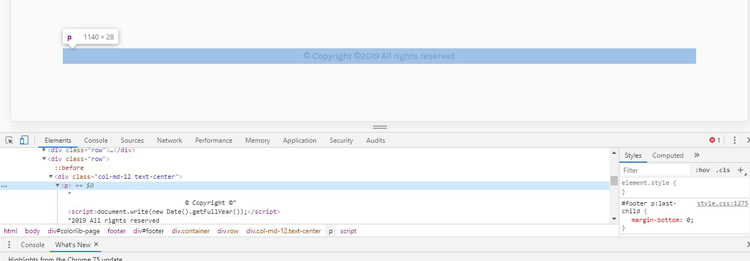
Find the corresponding code in the HTML file and edit it with your name and message. There is a <script>...</script> tag to show the current year automatically.

You Are Done!
Congratulations! You’ve just fully customized this HTML template and changed its content.
The template we edited together might be a simple one, but remember the process for customizing a template is always the same, no matter how complicated the design is. Just inspect the parts and identify the code for it to change, go to that code in your HTML file and edit it.
There will be some HTML tags you might don’t know, go search them in Google and find the function of it. It will gradually make you an expert of editing HTML template.
Start your journey with our enormous number of Free HTML Templates or look like a pro using our beautifully designed Premium Templates
Thank you for reading this article. For any questions or suggestions feel free to use the comment box bellow. 😊


Thank you for sharing such a informative content , It is very helpful who is new in this industry. Keep sharing such good content .
how can i display data from database specially i wanna use SQL server
is it possible
You can do it but you have to write the code by yourself or hire someone to do that.
Well, this is static html template changes only, so if you need to have database connection, you first need to code this in php or may be any other technology and then you can have database connection over that. I hope it helps. Thanks
I’m newbie in web development and I was looking for such guide. This will help me a lot to make my skill more productive.
Thanks for sharing.